Screenprinted watercolor monoprints can be created with the following materials: stretched white screen and base, a squeegee, transparent base, clear packing tape, watercolors, watercolor brushes and printmaking paper.

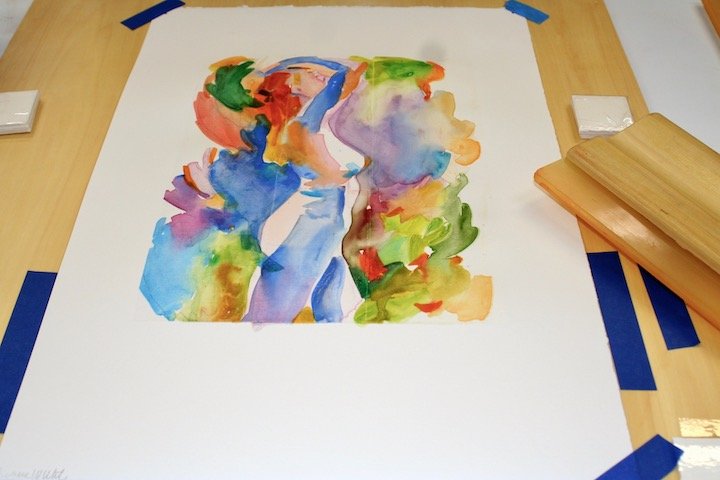
A finished watercolor ready for printing
A finished watercolor which has been brushed onto a white mesh screen.* Once the watercolor is completely dry it will be ready for printing. Let’s take a look at the process.
*Mesh count refers to the weave density of the screen mesh. The higher the count the denser the weave. The mesh count to use for this process should be anywhere from 195 to 230.

Preparing your screen
The screen should be large enough to accommodate your image. You will also need at least 2” of space on all sides. I had a large screen on hand which had extra room at the top which I covered with shelf liner. Draw a format opening lightly in pencil. This area will remain open and ready to accept watercolor. Mask the area around the format opening with wide, clear packing tape.
The screen should be attached to a sturdy base, such as coated plywood, with metal hinges.

Place a drawing under the screen
A drawing can be placed under the screen and very lightly traced onto it. The fewer and lighter the lines the better as graphite will print along with the color. You can also work freely without any guide.
Once the drawing is complete place risers of cardboard under the screen so that the watercolor doesn’t touch the surface underneath it.

Complete your painting
Add color with watercolors. Areas of paint can be lifted from the screen and repainted if necessary.

Place paper under screen
I used blue painter’s tape at left and bottom to keep the paper positioned in place. Short pieces of low tack tape are placed at right and left edges to prevent the paper from sticking to the screen when it is lifted after printing. The screen is held onto the plywood base with hinges. 100% rag paper (all cotton)* is best.
*Arches Cover, Rives BFK, Somerset and Stonehenge
Add transparent base
Pour or spoon Speedballs’s Transparent Base along the bottom of your image. Lift the screen up slightly so that it is not touching the paper below and then gently pull the transparent base across the painting to the top. This is called “flooding” the screen. Gently pull the squeegee over the image a few times until you see the color begin to dissolve into the transparent base ending with the squeegee at the top. Then lower the screen and pull the squeegee across image with a slow, steady, firm pressure.
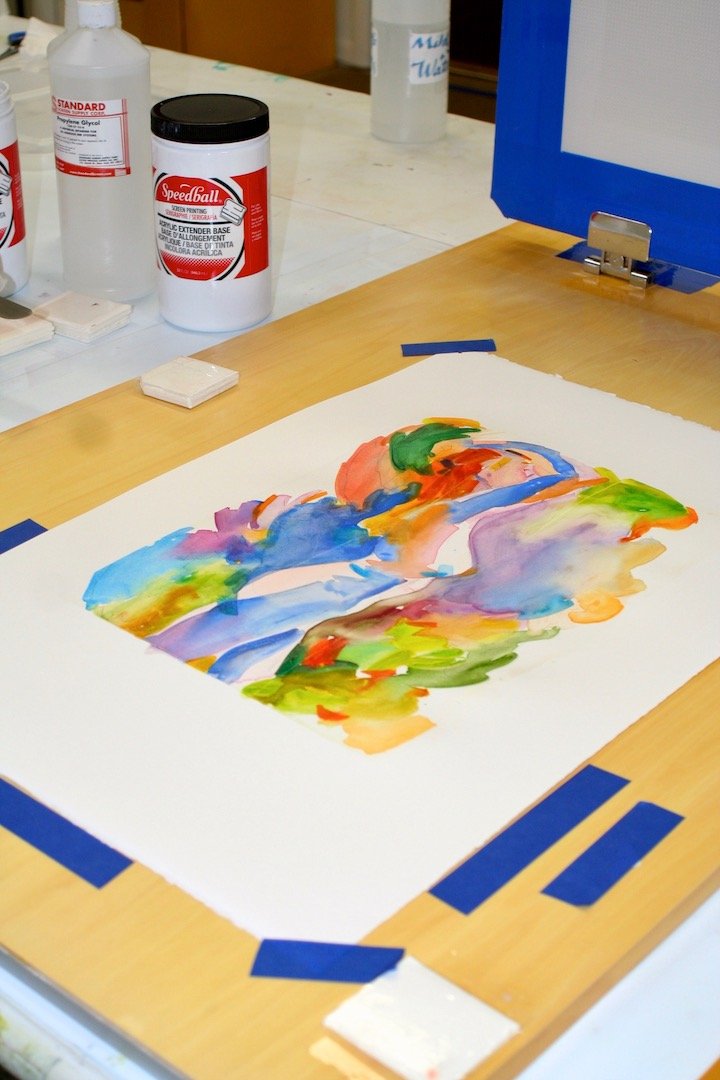
Image is transferred from screen to paper
The printed watercolor will be pressed through the screen and onto the paper below!
Experiment….
Be ready to experiment with your painting techniques trying wetter applications as compared to dryer applications of paint. Leave the base on the screen for different amounts of time with each print. Compare results and take notes. Water soluble crayons can also be used in this process.